Pro: Google Cloud Storage: Difference between revisions
From FileZilla Wiki
Jump to navigationJump to search
m (Reverted edits by 2600:387:2:803:0:0:0:72 (talk) to last revision by CodeSquid) Tag: Rollback |
|||
| Line 1: | Line 1: | ||
= Introduction = | = Introduction = | ||
This guide explains how to connect FileZilla Pro the Google Cloud Storage service. You will need FileZilla Pro 3.33.0 or later. | |||
= Step by Step instructions = | = Step by Step instructions = | ||
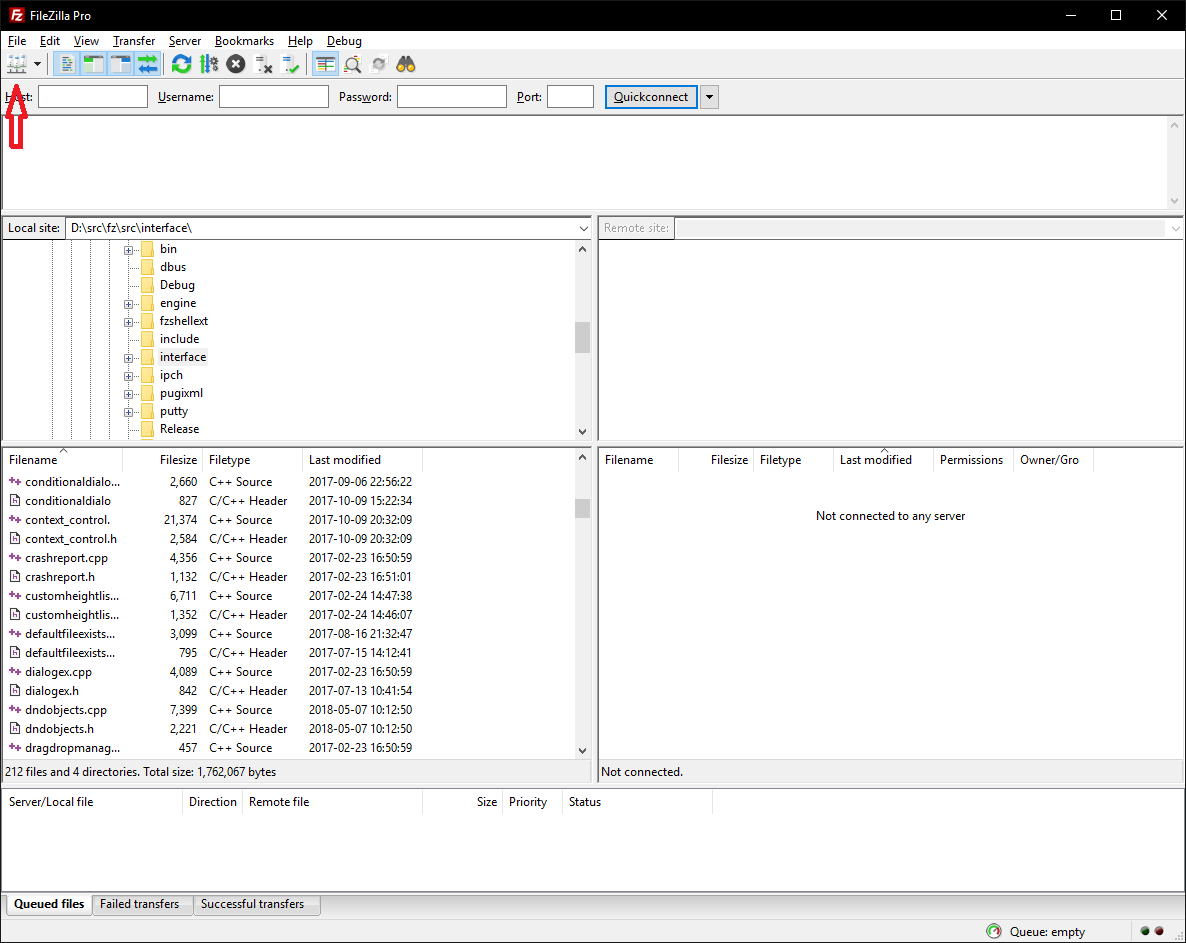
# Start FileZilla and open the Site Manager: | |||
#:[[File:Pro_google_cloud_1.png]] | |||
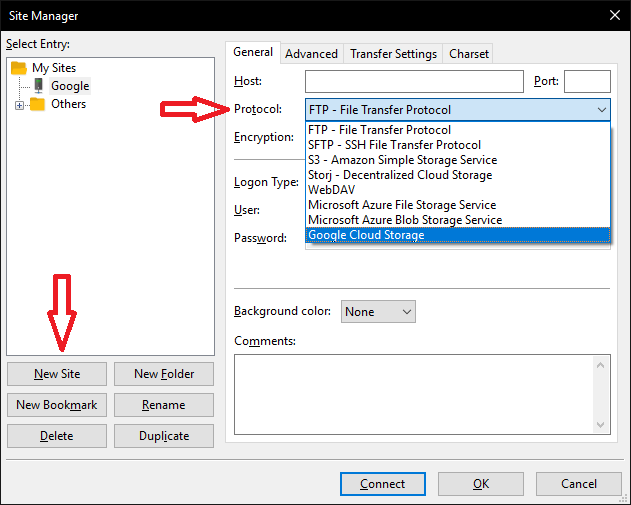
# Create a new site and select Google Cloud Storage as protocol: | |||
#:[[File:Pro_google_cloud_2.png]] | |||
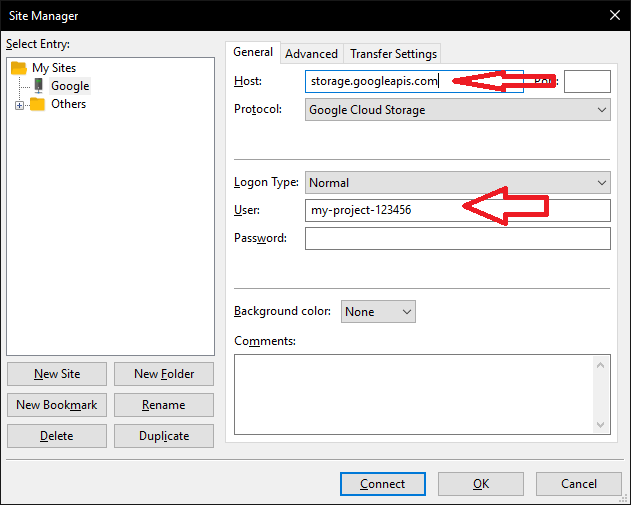
# Enter ''storage.googleapis.com'' as the hostname and your project id as your username. Leave the password field empty: | |||
#:[[File:Pro_google_cloud_3.png]] | |||
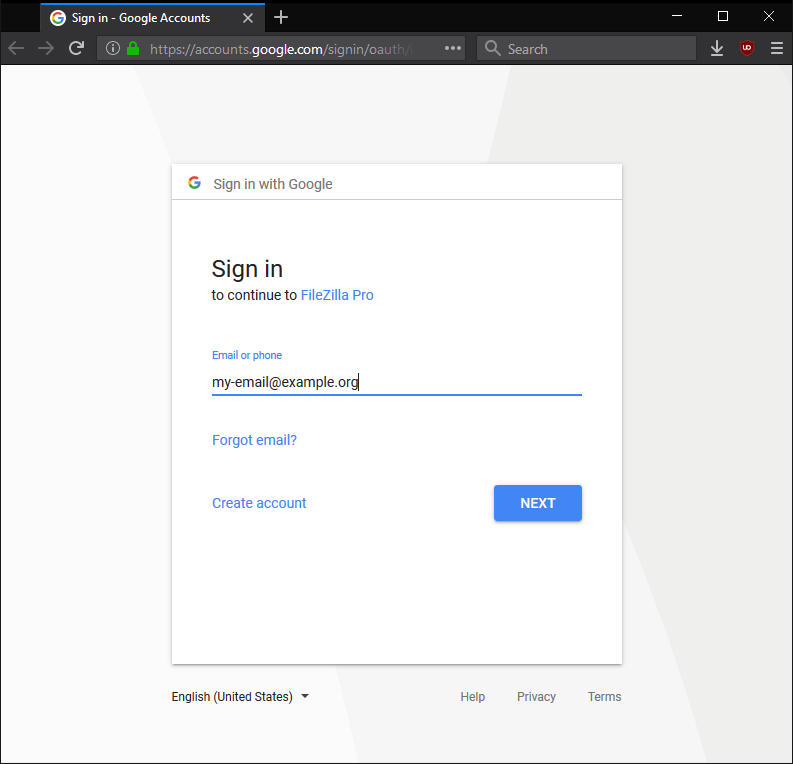
#Log in with your Google account: | |||
#:[[File:Pro_google_cloud_4.png]] | |||
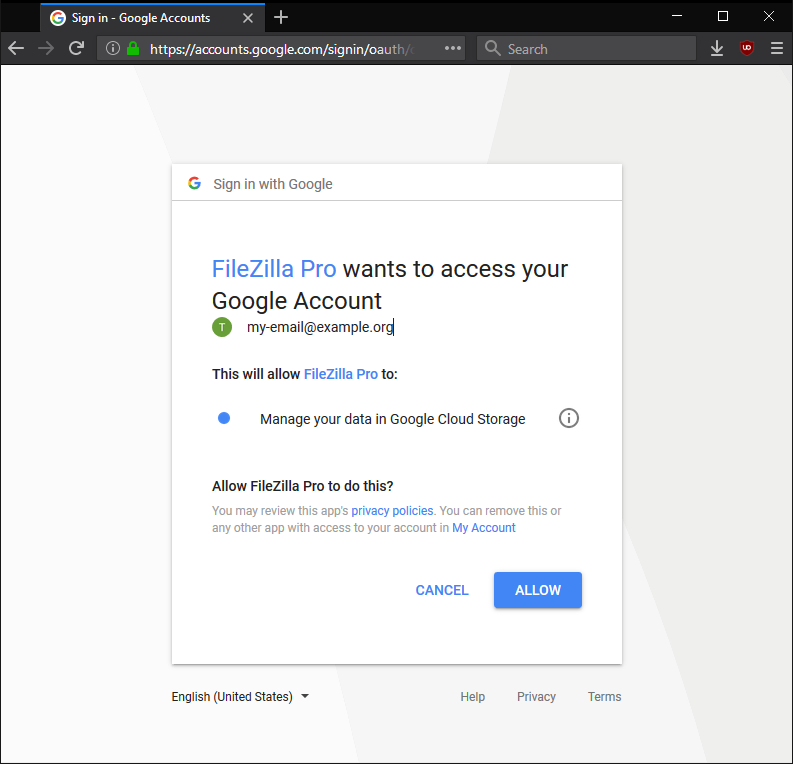
# Grant access to FileZilla Pro: | |||
#:[[File:Pro_google_cloud_5.png]] | |||
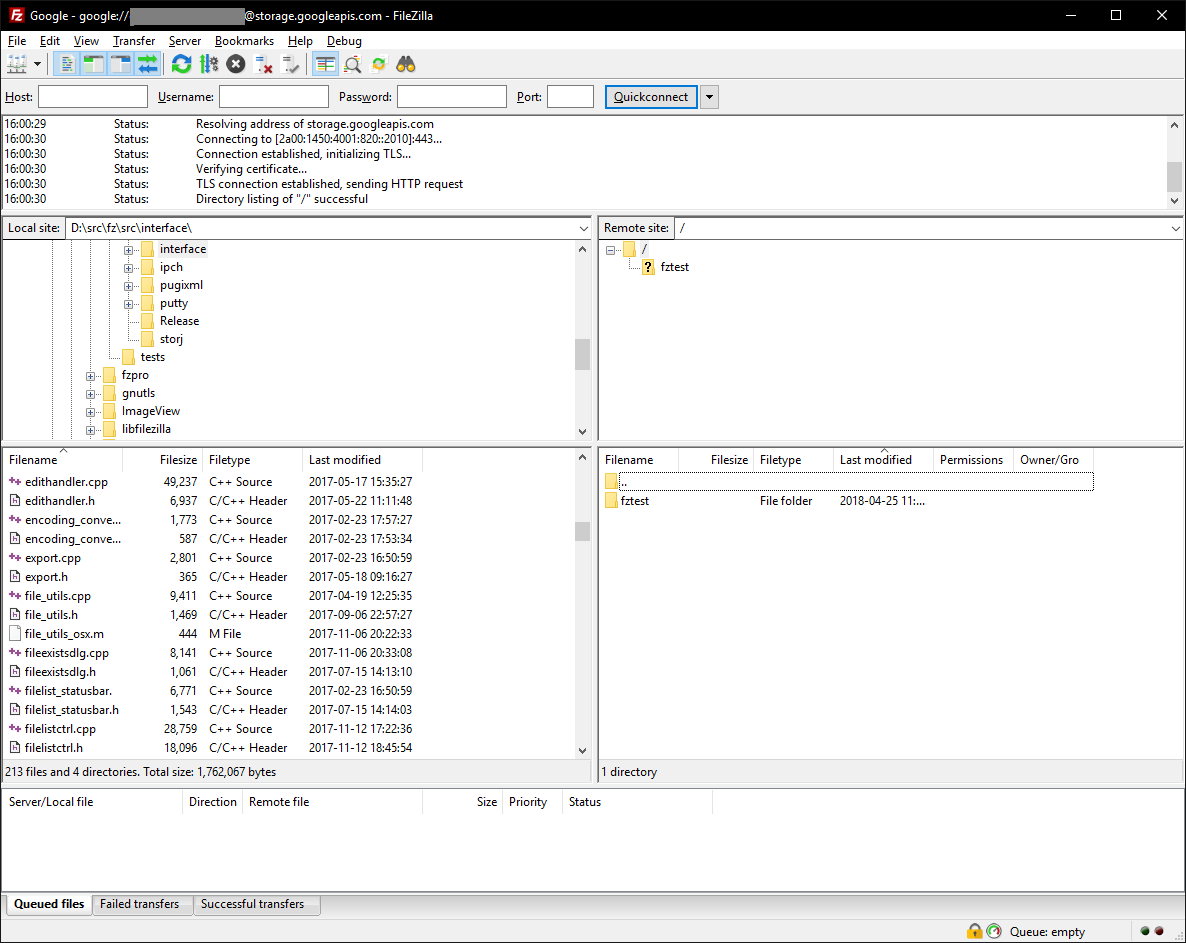
#That's it! You're now connected to the Google Cloud. On the right you'll see a list of your available buckets: | |||
#[[File:Pro_google_cloud_6.png]] | |||
For further instructions how to use FileZilla please refer to our [[Tutorial]]. | |||
Latest revision as of 06:47, 12 October 2023
Introduction[edit]
This guide explains how to connect FileZilla Pro the Google Cloud Storage service. You will need FileZilla Pro 3.33.0 or later.
Step by Step instructions[edit]
- Start FileZilla and open the Site Manager:
- Create a new site and select Google Cloud Storage as protocol:
- Enter storage.googleapis.com as the hostname and your project id as your username. Leave the password field empty:
- Log in with your Google account:
- Grant access to FileZilla Pro:
- That's it! You're now connected to the Google Cloud. On the right you'll see a list of your available buckets:
For further instructions how to use FileZilla please refer to our Tutorial.
