Pro:S3 Provider Configuration
From FileZilla Wiki
Jump to navigationJump to search
Introduction[edit]
This guide explains how to configure FileZilla Pro to connect any Amazon S3 compatible cloud provider.
In this guide you'll see the configuration for Digital Ocean provider as an example. However these instructions work also for any compatible provider.
FileZilla Pro uses this configuration to resolve a host name configured in the site manager to a specific provider.
Step by Step instructions[edit]
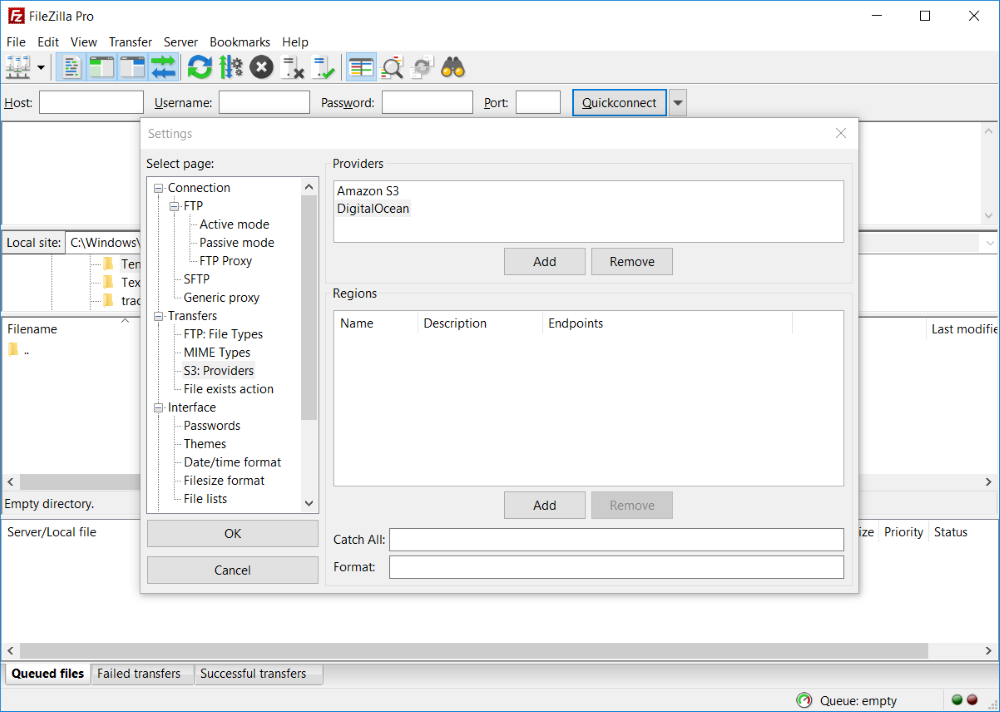
- Start FileZilla and choose Edit, Settings, S3: Providers:
- In the Provider list click New to add a new provider
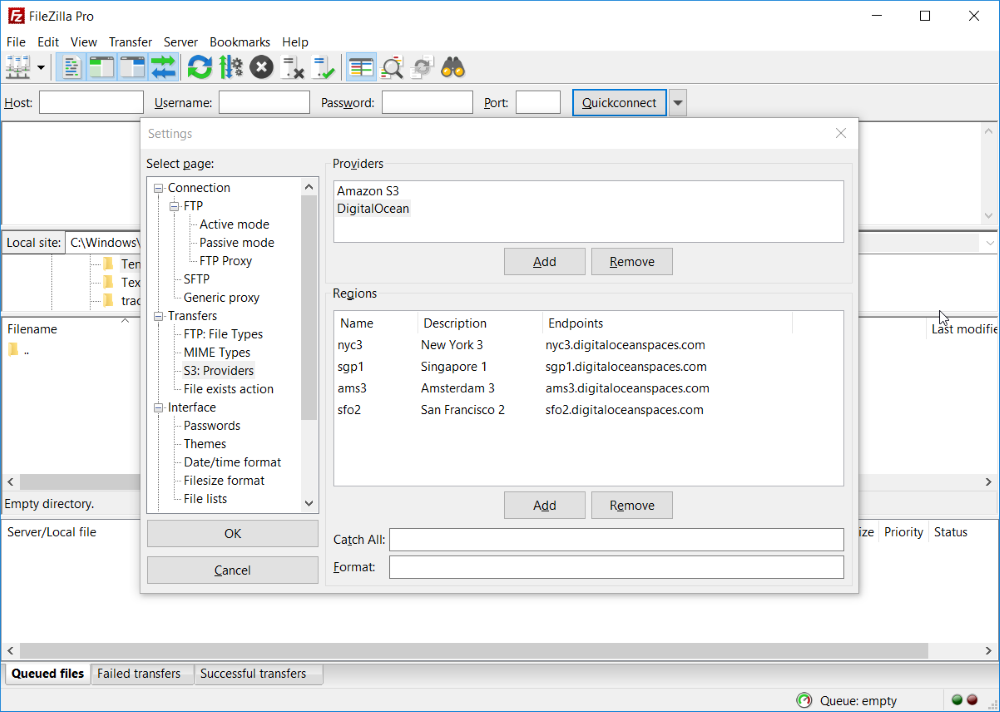
- In the Regions list you add the regions. This information can be obtained from your provider. For each region there is a name, a description and a list of endpoints separated by semicolon. FileZilla Pro will use these endpoints to match the host with a specific region.
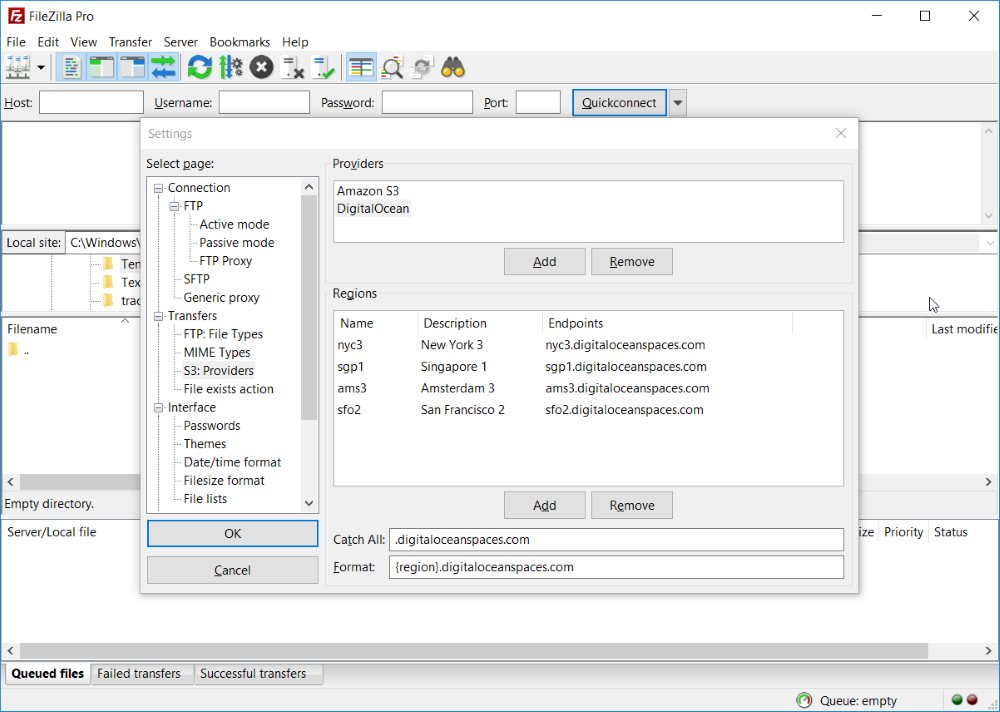
- Catch All is used to handle redirects to regions not yet known as when the provider adds a new region. Format is used to build endpoints for unknown regions. Format accepts the following tags {REGION} and {BUCKET}. Those tags are replaced by region and bucket respectively.
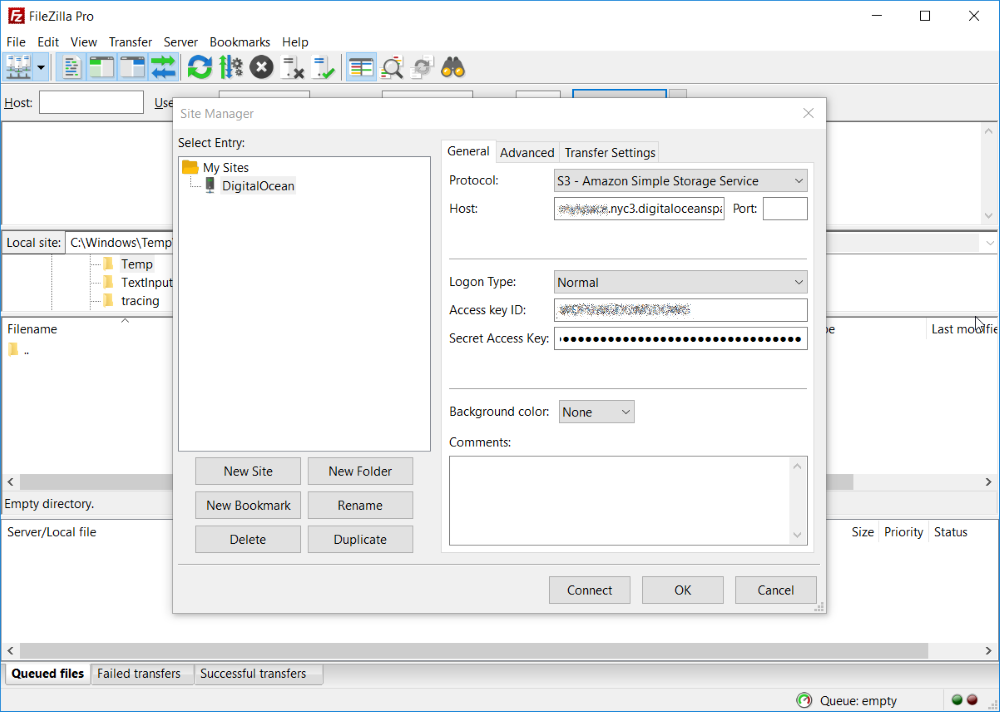
- In Site Manager add a new site:
- In Host enter the address of your space
- In Access Key ID enter your space access key
- In Secret Access Key enter your space access secret
When establishing a session with FileZilla, the correct provider and region is fetched from the list providers as follows, top to bottom:
- If the hostname ends on a known endpoint, the matching region and associated provider is used;
- Otherwise if it matches a catch-all, the associated provider is used, assume us-east-1;
- Otherwise fall back to the first configured provider (by default that's Amazon) and assume us-east-1
For further instructions how to use FileZilla please refer to our Tutorial.


