Pro: Amazon S3: Difference between revisions
From FileZilla Wiki
Jump to navigationJump to search
(Created page with "= Introduction = This document will give a brief introduction how to get get started using Amazon S3 with FileZilla Pro. This guide assumes that you already have an S3 accoun...") |
|||
| Line 17: | Line 17: | ||
#:[[File:Pro_S3_5.png]] | #:[[File:Pro_S3_5.png]] | ||
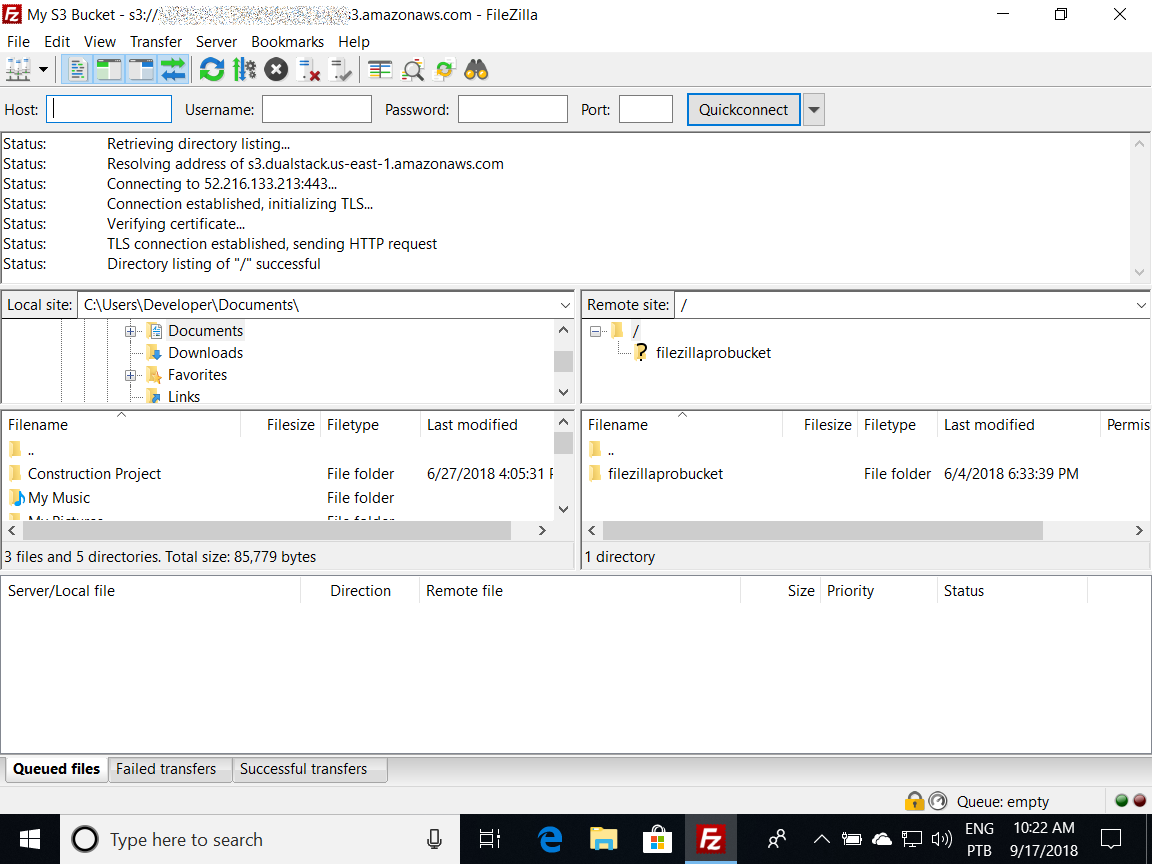
That's it! You're now connected to | That's it! You're now connected to AWS. On the right you'll see a list of your available buckets: | ||
For further instructions how to use FileZilla please refer to our [[Tutorial]]. | For further instructions how to use FileZilla please refer to our [[Tutorial]]. | ||
Revision as of 09:51, 22 August 2018
Introduction
This document will give a brief introduction how to get get started using Amazon S3 with FileZilla Pro. This guide assumes that you already have an S3 account. Keep your access key id and your secret access key at hand.
Step by Step instructions
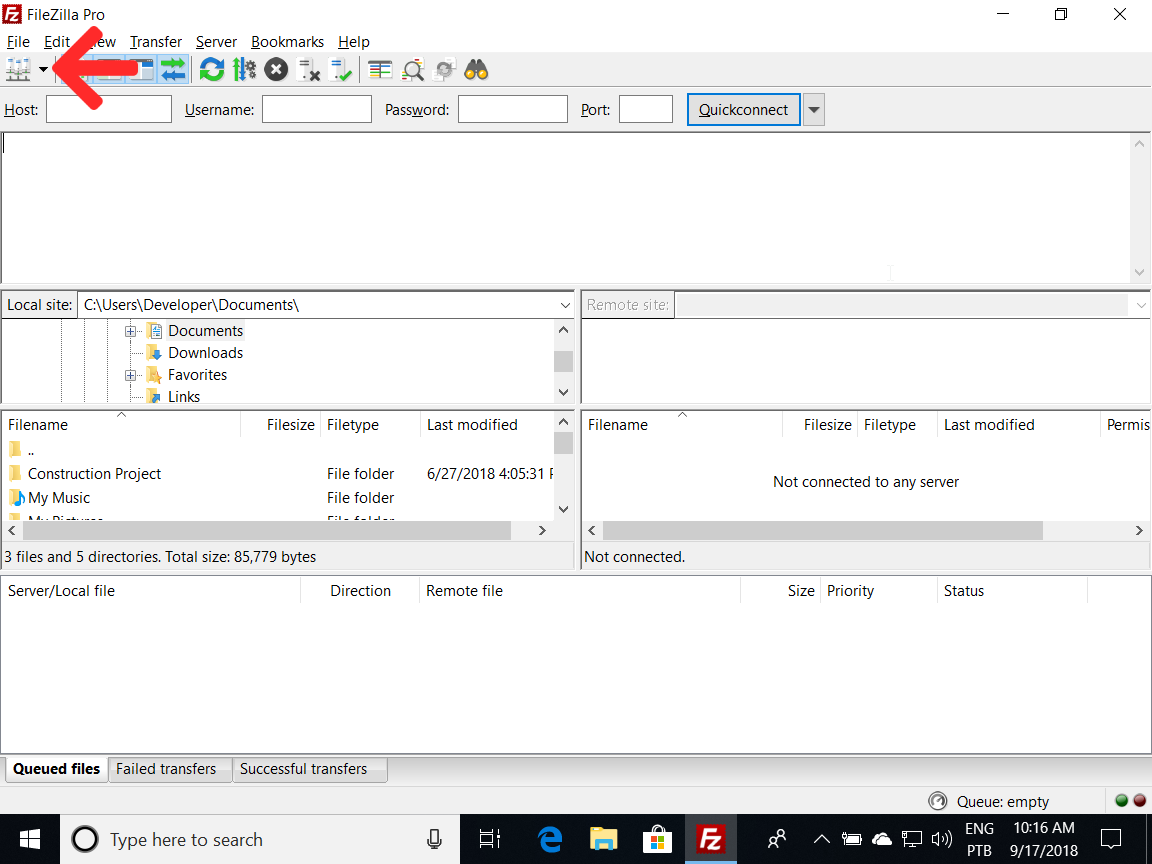
- Start FileZilla and click the left-most toolbar button to open the Site Manager:
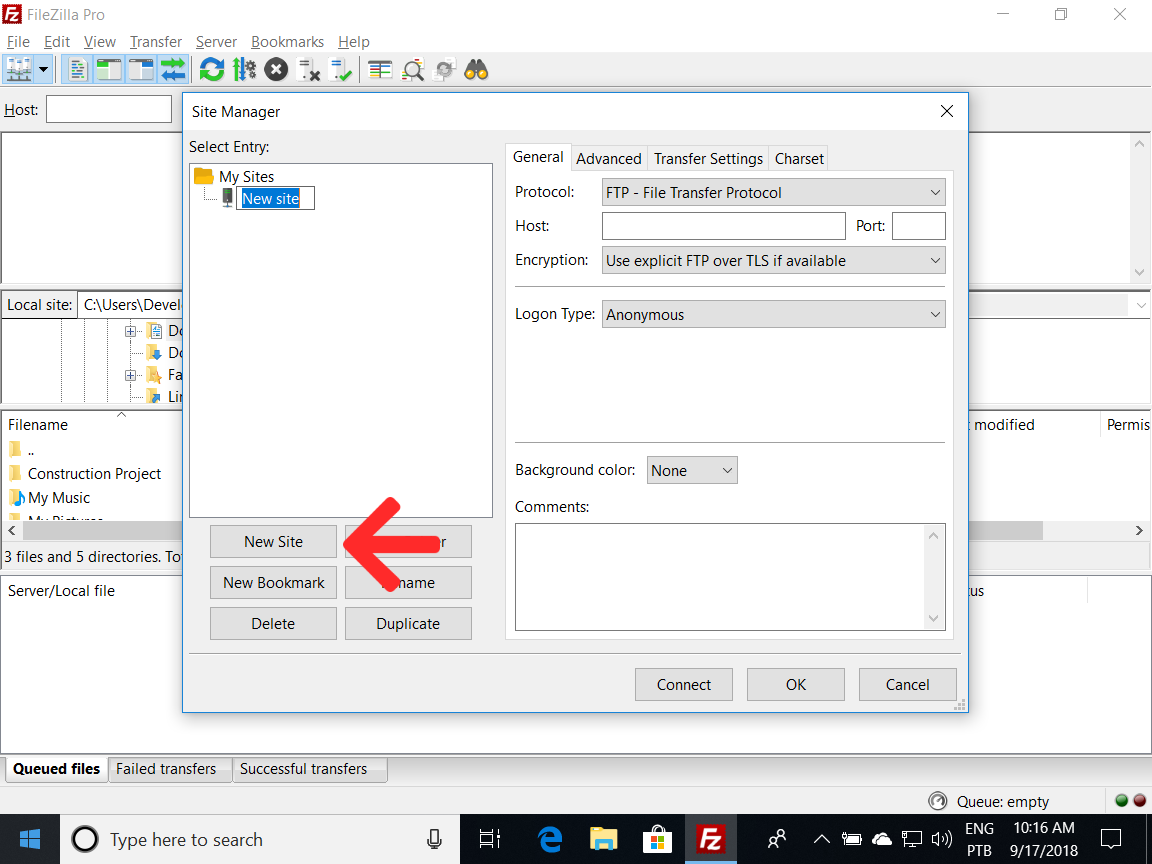
- Create a new site and give it a meaningful name:
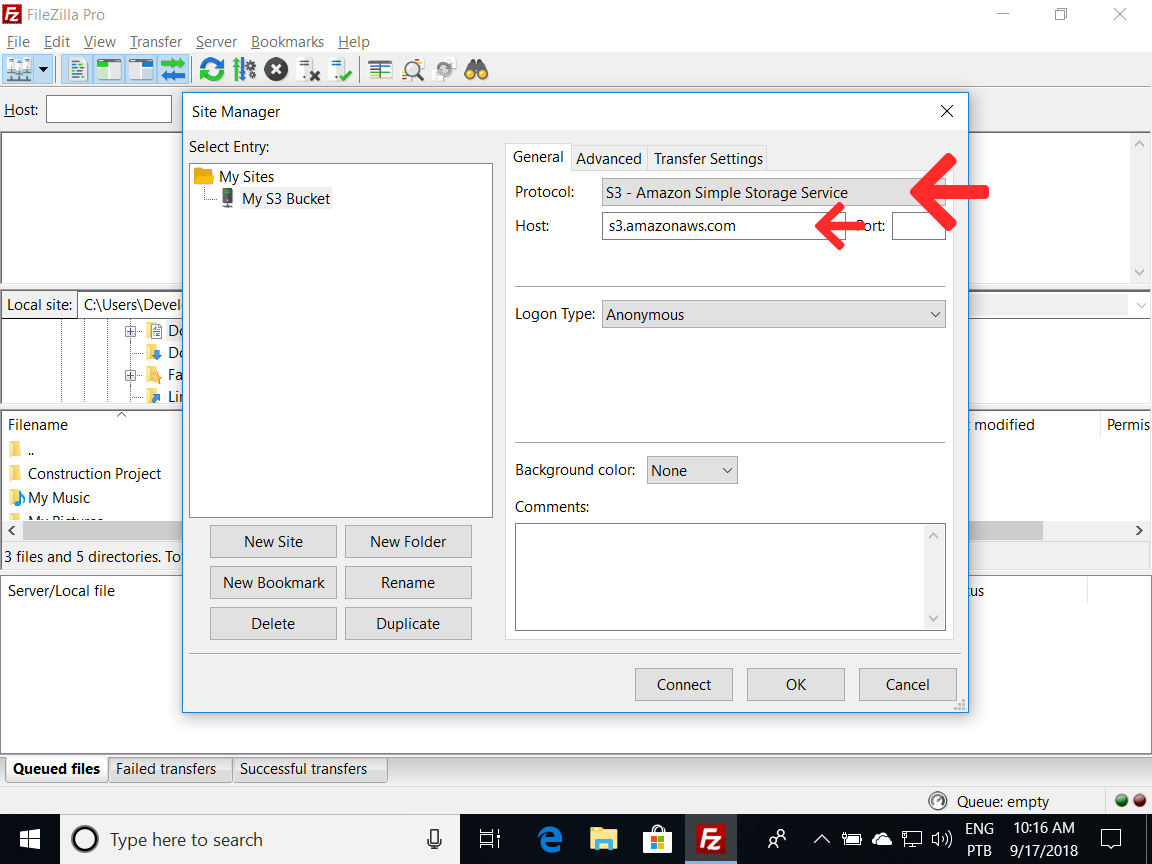
- Select S3 - Amazon Simple Storage Service as protocol and enter the hostname of the primary region you are using:
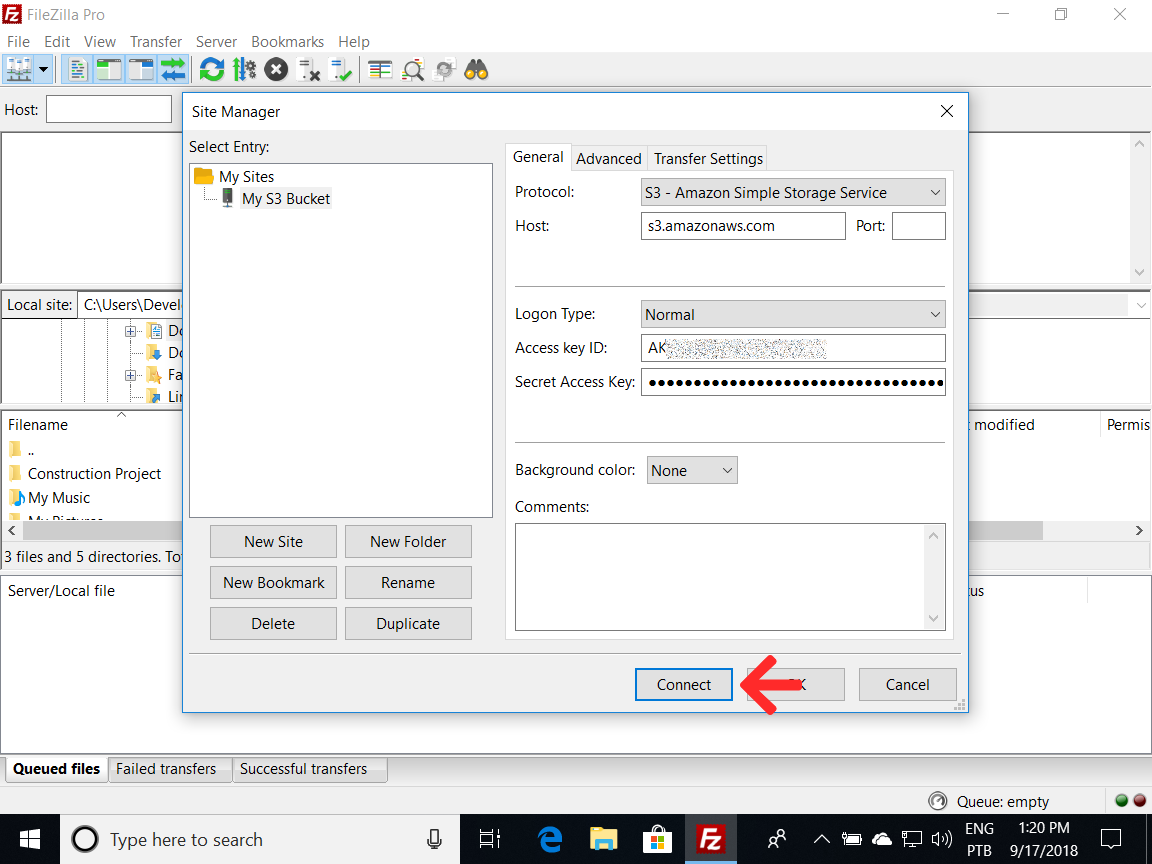
- Using the normal logon type, enter your access key id as username and your secret access key as password. Last but not least, click on Connect to save your data:
- You're now connected to S3 and will see a list of all your buckets on the right side:
That's it! You're now connected to AWS. On the right you'll see a list of your available buckets:
For further instructions how to use FileZilla please refer to our Tutorial.
