Client Installation
|
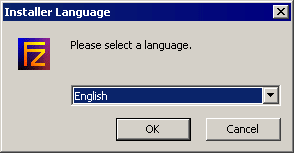
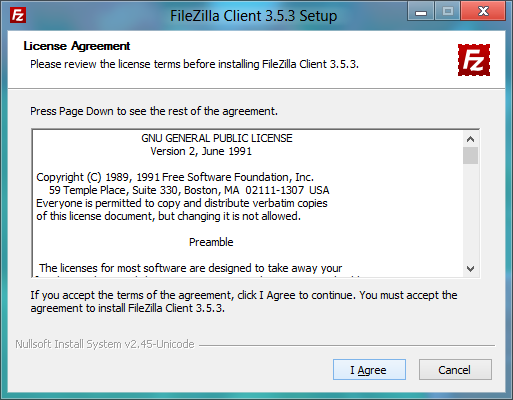
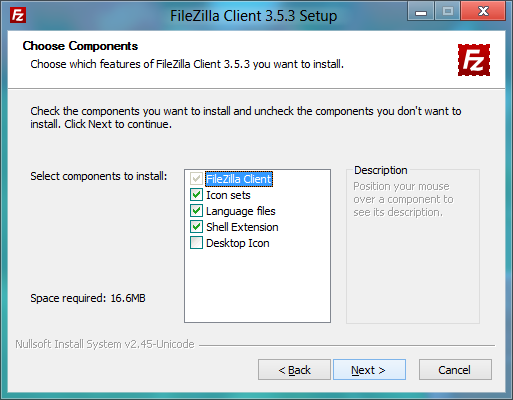
This documentation attempts to explain installation of the FileZilla FTP and SFTP Client. FileZilla comes in three versions. There is an installer version that offers ease of installation and uninstallation for novice users, a zipped version for people that don't like installers or have special needs, and then for the advanced user there is a source version which lets you take a look at, modify and/or compile the source code of FileZilla. Don't worry if you find this confusing, I'll get back to each of them in depth later in this document and try to help you choose which one you need. Dear Admin,this is a major problem if I reply OR frorawd a message which contain any attachment (including signature pictures) it will not go out and red cross appears immediately (without connection to internet): Send failed please resend null .My phone is 9800 TorchPLEASE FIX THIS ASAPI also asked how can I pay via paypal please answer. Installing on WindowsWith installer versionMake sure that the user account which is being used for the installation has administrative rights that allow the installation of software. Installer languageA screen will be displayed where you can choose the Installer Language, select the language you require from the list. Then click on OK to continue. License agreementHopefully you should now see the following window where you will have to accept the terms of the license agreement to continue. Read through it and click "I Agree" if you do. Choosing componentsNext you need to choose which parts of the FileZilla client you want to install. If you hover your mouse over a choice, FileZilla will show you a description of the item. Here is the window: Go through all of them and just check/uncheck the stuff you want. I would recommend getting the English or French documentation, additional languages if you want FileZilla in another language than English, Start Menu Shortcuts and Desktop icons for easy access to the program after it's installed and then finally debug files which like I said can help fix problems with program bugs/crashes. So I basically recommend going for the "Standard" type of install, installing everything except the source code which is just for the advanced user who knows if he wants it or not :) When you're all finished, click Next. Install locationThe next window will ask you where to install the program. If you don't have any special needs, click Next. TIP: If you want to put your FileZilla installation on a usb stick or some other kind of portable storage, you can specify to install FZ to that location here. But you need to use the xml file for storing FileZilla's settings so that they also get transferred when you use the usb stick on another computer. You can specify this later in the installation process.. Regardless if you chose to install the start menu shortcuts or not, you will be asked what you want to name the folder with the shortcuts to FileZilla inside. The default name "FileZilla" should be good for most people. You can also choose not to install these shortcuts (again you say? yes, again! :p). Finishing installationWhen you click Next, FileZilla will get installed. If no errors occur it should complete in some seconds. When it's done, click Close to finish the installation. Congratulations, you've now successfully installed the FileZilla Client and can now move on to running! With zip versionInstallation with the zip version is very simple as long as you know how to work with zip files and can manage general file and directory handling in Windows. Basically you just extract (unzip) the downloaded file to a folder on your disk, e.g. "C:\Program Files\FileZilla FTP Client\" and then just start FileZilla with the filezilla.exe file afterwards. It might be a good idea to make a shortcut to this file on your desktop/start menu/quick launch so that you can easily access it. To create a portable installation of FileZilla on a USB stick or any other portable storage, you first have to extract the ZIP file contents to that location. Then, you must create a file named fzdefaults.xml in the same directory as the FileZilla executable. There's an example file in the ./docs subdirectory you can use as template. Follow the included instructions in the example file to set the config location to a relative path on your portable device. Installing on Mac OS XPlease note that the official binaries for FileZilla require OS X 10.5 or greater. To install FileZilla, simply download the appropriate file to your computer. Most Macs made since 2006 use an Intel CPU as processor, so you want to download the package for Intel processor. However if you have a G4 or G5 CPU, you want to use the PowerPC package. If you are unsure, try the Intel version first. If you have downloaded the FileZilla package using Safari, it will be automatically extracted. You might have to manually extract the archive if you're using a different browser. To start FileZilla, simply doubleclick the extracted application bundle. Covered Top of FileZilla-Window by MacOS-MenuWhen you start FileZilla in the Finder, then you will see that the window of FileZilla is covered by the top menu. You may find it difficult to move the window, because you cannot click on the covered top of the FileZilla-window. Tip: You can resolve this problem by changing the resolution of your screen and then change it back to the original resolution (during the resolution change, OSX re-checks that all windows are properly oriented). Installing on GNU/Linux and other Unix(-like) systemsIt is recommended that you use the package manager of your distribution. If you're using GNU/Linux, you can also try using the precompiled binaries. After extracting the files to any location (location does not matter, FileZilla can detect its own installation prefix), you can start the program using the filezilla executable in the bin/ subdirectory. Please note that due to differences in distributions, the provided binaries might not work on your system. Alternatively you can also compile FileZilla from source. Compiling FileZilla from sourceYou can find compiling instructions on this wiki. If you have questions regarding the compilation have a look at the forums. RunningFileZilla is simply run by double-clicking the filezilla.exe file (default location: "C:\Program Files\FileZilla\filezilla.exe") or one of the shortcuts on the desktop or in the start menu that you may have created during the installation of FileZilla. There are command line arguments you can use. |
FileZilla Client Documentation Contents
|


